Converting the input from the sensors into an output that actuates what you’ve designed is the core of coding. To achieve an efficient and convincing prototype experience we divided the Auditum code in two: the first part, using the Arduino programming language, sets, mainly, the light area; the second part, managed by Processing, works on the audio.
Arduino code
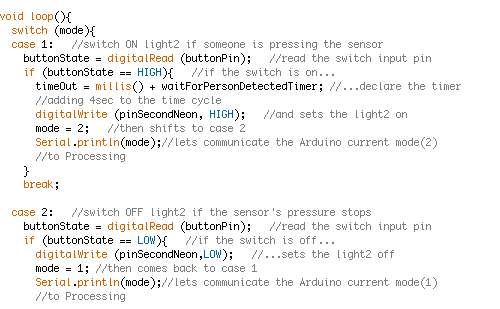
The aim of the Arduino code is let sensors and actuators work efficiently together: it means switch-on the lights according to people’s passage through the prototype, show the information, tell Processing to play/stop the audio-track and regulate its volume.
After defining all the variables, we started, in the void setup(), configuring each specified pin to behave either as an input or an output, using pinMode. We also used a serial statement to allow communication between Arduino and Processing.
To organize and translate the input received from the sensors through the Arduino board, we built a code based on the switch case: an easy and efficient structure that let us manage all the different output. To have the shortest and cleanest code, we used an array and a for statement for the sequential switching on-off of the lights. Several efforts were spent on timing: our code uses a lots of delays and timer variables that synchronize the lights’ switching on-off with the footsteps audio-track, managed by Processing.
To go deeply into the code, download the PDF source code (70kb) or the ZIP file (4kb) to let it run on your computer in the Arduino environment. If you don’t have Arduino you can download it from the arduino.cc website.
Processing code
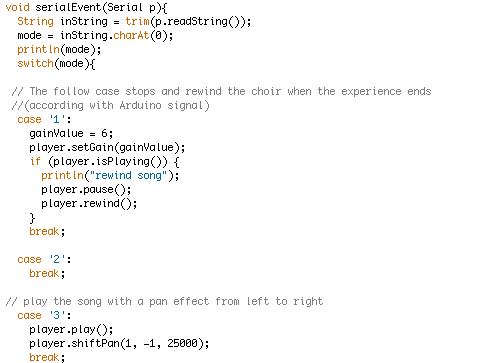
Processing code manages the Auditum sound section: it has to communicate with Arduino in order to play the audio-track (with a pan from left to right) depending on people’s time spent in the colonnade prototype and regulates the sound’s volume, according to the noise made by users.
The code prototype uses a statement based on the volume’s condition but for the real installation we think the best way to solve the problem of managing the increasing-decreasing audio volume is working on the frequencies of the audio-track and the human-voice filtering them (have a look at the technical experiments section, under the voice sound).
After importing the minim library and the processing.serial one, we enabled the communication between Processing and Arduino thorugh the serial condition.
Through the void serialEvent() Arduino communicates to Processing the different states of the system, according to the different moments of the interaction. Even in this section, the Processing code, as in the Arduino one, uses a switch case structure in which each state (that we called “mode: 1,2,3,4” as for the ones in Arduino code) has a direct relation with the corresponding one in the Arduino void loop().
We spent also enough time working on the increasing-decreasing volume section of the code but, at the end, we achieved the aim proposed for this area of Auditum interaction. We checked the volume of the choir audio-track, that we fixed as 0.07, and we declared it as the maximum volume level (0.07_newMaxl). If the signal got from the mic exceeds that level, a counter in the void draw() increases its own value. This value, checked every 100 milliseconds by a timer, sets the talking variable value ( 0 or 1 depending on whether someone is making noise).
To go deeply into the code, download the PDF source code (56kb) or the ZIP file (5,6Mb) to let it run on Processing. If you don’t have Processing you can download it from the processing.org website.
Home | Concept | Context | Interaction | Possible interactions | Technology | Prototype | Code | Experiments|Interaction experiments | Technical experiments | Final considerations | Credits | Downloads |


